Translate

Thursday, February 24, 2011

My OOAK Beautiful Julie Campbell Dolls (BellaBelle Dolls)

A couple of weeks ago, I was going through my stash (early spring cleaning) and found some of my wonderful doll treasures! I have been in LOVE with Julie's dolls since I found her about 6 years ago on eBay through the eBay CDHM group there. Each of her dolls are OOAK (One Of A Kind) and hand sculpted without use of molds.

I love to look into people's eyes. It's my favorite feature on the human body and her dolls had the biggest sweetest eyes ever! I started buying her dolls for the many scenes I wish to create for myself one day. I have some Tudor period dolls, Gone with the wind dolls, I even commissioned her to do dolls of the "Chariman & Sayuri" from the Book (and Movie) Memoirs of a Geisha. This past Fall, She surprised me by making me the dolls from the Twilight Saga, Edward & Bella. I had commissioned her to make them a little over a year prior and she had a lot going on and so did I and I knew she would get around to them when she could and one morning I logged into facebook and she had tagged me in the photos of my dolls. They were done!

Anyway, I thought I would share the "Eye Candy" with you all. These are not all of the dolls I have from her. I could not find the box until a few days after I took these pictures. I'll add the other ones to this album at a later date.

To see what she has for sell or to commission her to do something for you, Go to her blog here:

http://bellabelledolls.blogspot.com/


You can see some of my dolls by clicking Play, right here:


My Julie Campbell Dolls

Thank you For Stopping By To Read My Blog!

Thought Of The Day ~ "Our lives begin to end, the day we become silent about things that matter." Martin Luther king, Jr.

Remember, Whatever you do, do it with Great Passion & Love

•*¨*•.¸¸♥ Tracy ♥ ¸¸.•*¨*• 
PS. Monday I will start Turbo Fire!! The DVDs came in the mail! I am so Fire up and excited to start a new workout program. Anyone else starting or completing a workout program? Anyone having success in their workouts? Tell us about it!!


Wednesday, February 16, 2011

Customized Dollhouses, Contest for 2011, Fitness etc...

I'm just so Excited!! Dean just sent me the "Mock Up" picture of the 2011 Greenleaf Dollhouses Spring Fling Contest Doll House and right away, I saw it in my "minds eye" being "kit bashed" ("edited" to those not used to this term) in several different ways!

I called him because we had not talked at all this week and I know we have only about 1 week or so  before he has to ship one to me to decorate for the contest. This morning I had run out to do some errands and when I got home, I sat down to do some work and thought "I should call him now before I start on something". Dean answered the phone and the first words out of his mouth was "what did you think of it"? Well, I was not at the computer nor had I checked it this morning so the next thing Dean heard was my loud scream of excitement (Sorry Dean lol)!!

I am totally in love with it and we have changed the dollhouse style for this years contest 3 times (This one is the third) and I am the most excited about this one because it can be edited to fit whatever the contestant desires. I can not wait to see the real house because the mock up is Wonderful. It is another Laser Cut house and it will be a 1" scale Dollhouse and March 20th can't come soon enough!

I am bursting with wanting to share a picture with you all but alas, I can't but I could not hide the fact that this years kit so far has me the most excited of all the past kits.

Today, I am about to start working on some more resin hand painted cellar doors. I am also working on some tables that I will be putting up for sell on eBay (or maybe I'll try selling on etsy this time). I have a lot of new items I have been working on all winter and I know I have not been selling much on ebay as I used to. I like to Thank all of my past clients who send me notes asking about what I have been working on and checking in to see if I am OK. It's great to have Clients that are also Friends!

Here is a shot of one of the cellar doors. I made the original out of wood and then I made a mold and made some resin ones to sell (it's faster to do this way and the cost is less for the customer)


I don't have pictures of the tables yet but will soon!

My next 2 projects are special order half inch scale Buttercups and then I have a Special order for a Chantilly which should take up the rest of winter and part of Spring since I also have a few other things I am working on in between those projects. I am taking custom orders for the smaller houses right now to be finished by Summers end. Unfortunately, I will not be doing any of the bigger houses this year.

I hope to have my website back up and running soon. I closed it because I had several personal things I had to take care of starting last August and finally, I have been able to take a breather and get back on track with the Miniatures. I have a lot of fun ideas floating around in my head and you should see them popping up a little at a time for purchase so keep checking my blog and my website address will still be minisontheedge.com I will make announcements when the website is up and running again! The snow is melting outside and it has me thinking of Spring.

Well, I think I better get up and start working on some things. My workout today will be Arms & Shoulders P90X. I may walk on the treadmill too later on. I am thinking of switching up my routine and am thinking of doing a new workout program Turbo Fire . I ordered it because I love the Turbo Jam work outs and this program is from the same Trainer, Chalene Johnson. I'll let you know soon when I get it and start doing it. 

My Niece is getting married this Spring and so is a Friend of mine and the weddings are approaching too soon!  I gotta look good so I gotta keep fit. I Love music and the music was cool with the Turbo Jam workouts and I think I need a switch from Turbo Jam & P90X because, though I love the results, I am getting bored (which means I won't stick with it soon if I don't change it up again).

 The Thought Of The Day ~  "Challenges make life interesting, however, overcoming them is what makes life meaningful." Mark Twain

Thank you for stopping by to read my blog today!
Whatever you do, do it with Passion! 

•*¨*•.¸¸♥ Tracy ♥ ¸¸.•*¨*•

Tuesday, February 15, 2011

Shabby Chic Completed Dollhouse


Birds, Bunny Rabbit and a cat are the little creatures you'll see peeping around this cute little cottage! Sometimes, I get excited about a project when it begins to look like what I saw in my minds eye and this house did not disappoint me. When I looked at the bare kit, this was exactly what I saw and it was fun making it into this dream cottage pictured here.


The basic die-cut wood kit comes to the customer with wood pieces for the house. The roof that comes with this kit is corrugated cardboard. The windows and doors where square which just did not match the roof line to me so I added a different door (It is the interior doors left over from a Glencroft kit from Greenleaf Dollhouses). I added wood decorations to the tops of the outdoor window to jazz it up some and to also add a curve that was missing on these windows. I also electrified the house so that all of the lights and the outlets work and come on when plugged in. I made the statue of the little boy holding a bird. I sculpted him from creative paperclay. The roof tiles, stones and brick and even the grassy base are all created using creative paperclay. I made the rose bush with delicate rose flowers and petals. The vine next to the front of the house house 2 birds and I also made the bird house out of wood that is on the side of the house. The rose door knocker was also made by me using creative paperclay and painted floral wire.


This was a fun house to build. It is 1" scale and the measurements are 18" W x 17"H x 14 1/2" D (including the base).  It will be listed for sell here at my Minis On The Edge Store. The bed, couch, stool & chair will be included in the sell of this house. Look for the tutorial on how I created the dresser and the bed in the next Greenleaf Dollhouses Gazette Online newsletter.


You can see More Pictures of this house by clicking here:

Thank You So Much for stopping by to read my Blog!

Thought Of The Day ~ “Don't wait until everything is just right. It will never be perfect. There will always be challenges, obstacles and less than perfect conditions. So what. Get started now. With each step you take, you will grow stronger and stronger, more and more skilled, more and more self-confident and more and more successful.” ~ Mark Victor

Don't For Get The Passion!
Tracy
✿•*¨`*•. (¯`v´¯) (¯`v´¯) .•*¨`*•✿
. . . ✿•*¨`*•.¸(¯`v´¯)¸.•´*¨`*•✿ . . .
      ………. ....♥ •.¸.•´♥…………..........

Saturday, February 12, 2011

Shabby Chic Dollhouse Painting

I wanted to add some updated shots of what I have done so far to this cute cottage. I'm still not finished. There are rose vines and other flowers & birds etc. to add but, I am totally feeling it! I guess there is still a girlie girl in me somewhere cool.gif

I Hope You Enjoy the Eye Candy! More to come on Monday. I hope you all enjoy the rest of your weekend! I know I will.

Thought of the Weekend ~ A successful person is one who can lay a firm foundation with the bricks that others throw at him or her. ~ David Brinkley


Live Your Life with Great Passion & Love!

♥☆♥ Tracy ♥☆♥ 


Friday, February 11, 2011

Greenelaf Dollhouse Kits picked as 'Readers' choice Awards

I  just wanted to let you all know that 2 of Greenleaf Dollhouses kits for has been selected as the Miniatures' Readers' choice Awards at about.com. The two kits are the McKinley and the Beacon Hill and they have made it in the five finalists in the Miniatures' Readers' choice Awards for Dollhouse Kits. Greenleaf Fans, Now is the time to cast your vote!!  Let people know We LOVE Greenleaf dollhouse Kits.

To vote for the Mckinley, Click here:

Mckinley Vote

to Vote for the Beacon hill, Click here:


Beacon Hill Vote

I have built both kits in the past and you can visit my Gallery for the Beacon Hill Here:


Beacon Hill 2010

You can see the Mckinley here:


Black Briar (Mckinley)

On another note, I would like to Congratulate Casey of Caseyminis for also being nominated for having the best Miniature blog! She has been a member of the Greenleaf Family for 3 years. You can vote for her here:


Casey's Minis Blog Vote

Thursday, February 10, 2011

My Shabby Chic DollHouse

 I finally finished the Paperclay sculpting work on this house! I hand sculpted the shingles, stones and bricks from an air dry clay called Creative Paperclay. It goes on wet, soft and it is odorless. The fact that it is odorless is the main reason why I love this one so much. It is an off-white color while wet. It dries a more pure white color and is so lightweight when it dries. Now, I can't wait to bring this to life with paint! Here are pictures of the house as of today. I will keep you all posted with progress pictures!! It looks pretty plain right now, doesn't it?
:D


Thought of the day ~ Change is the essence of life. Be willing to surrender what you are for what you could become.

Worked out today.... Today was Yoga and it felt good to be back at it.
Thank you For stopping by to read my blog! 

♥☆♥ Tracy ♥☆♥


Thursday, February 3, 2011

February 2011 Winter Storm Wow

I have never witnessed such a powerful snow storm in all my life! It was Beautiful though. My Parents said in Chicago they had some Thunder with their Snow Storm. We missed the Thunder part but Nothing else. According to news reports, our part of Wisconsin got 2' (2 feet) of snow!!

The Girls got to  go outside in it for a little bit yesterday. They were totally excited that they had the past two days off of school. They helped their dad shovel the car out of the parking space. Our car and our neighbors cars were all buried and they had not even plowed our street yet when these pictures were taken:


This is a shot off of our back deck where we live. That street is usually busy with cars and trucks but not yesterday:


Our poor tree up front is buried in the snow today:


Today, it is very sunny out but it is Freezing cold out there so the kids can't go out an play. I Hope you are all Safe & Warm. Looks like we'll do some reading today and maybe a few craft projects so I won't hear those dreaded words.... "I'm Bored" LOL!

Thought Of The Day ~ "Better to do something imperfectly than to do nothing perfectly" Robert Schuller

Live Your Life With Passion & Love! Thanks for stopping By to read my blog Today!!

♥☆♥ Tracy ♥☆♥

Tuesday, February 1, 2011

Painting Resin Dollhouse Furniture

I have several Resin furniture pieces that I had no use for. I used to sell them on my website but stopped when I got down to the last few because I decided to try something. The two sets I sold were really pretty pieces but, they had Horrible paint jobs. As I was building this Shabby cottage, I decided to take out my Pink Can of spray paint from Krylon. It adheres to just about anything, even the resin!!!

This is what It looked like straight from the package:


This is what it looked like after the Spray Paint:


I will add white highlights to it using the "dry" paint brush technique. I am now pleased with this little piece of furniture. So if you have any of those Ugly resin furniture pieces, You can "reupholster" it's look with a simple can of paint.

:)

Thought Of The Day ~
The best things in life are unexpected - because there were no expectations. ~Eli Khamarov

Thank you For Stopping By To Read My Blog!! ~ Tracy

Wednesday, January 19, 2011

Pink & Shabby Custom Dollhouse Day #2

The Little girl inside of me must really want out because this project is actually flowing totally according to my plans. Last night I went to bed very late (or early depending on what you call 1 am). I had my music pumping and I was going with the flow. Sometimes, when I am thinking too hard about other things (real life things), my creative juices goes into overload.

First, right before I went to bed last night, I started on this bed for the upstairs room. The rooms in this kit are very small so I wanted to utilize the space and give the impression that there is more space in here than it actually is.

I have always considered my style of artistry to be more on the side of an Impressionist. The definition of Impressionist is * a literary or artistic style that seeks to capture a feeling or experience rather than to achieve accurate depiction. Through my blogging of this cottage, I wish to share with you new inexpensive ways to achieve the look of some expensive things that we buy in miniature. You will be able to do this with card board scrap pieces of wood and dollhouse wallpaper or even scrapbook paper. My goal is to try and help YOU, learn how to achieve the look of realism by applying skills of an Impressionist.

I already knew that today, I would do a tutorial. After I started making this bed last night, I wish I had been more awake so that I would have thought to take out the camera to take pictures of How I created it. Here is a shot of the Bed I started on last night and at the end, you'll see what it ended up looking like when I completed it.


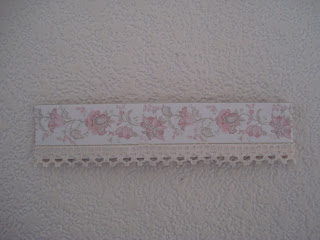
Today's tutorial will be on how to make a Cornice. You will need:

cardboard, scissors, tacky glue, wallpaper (or scrapbook paper), balsa wood and lace trim. First, you need to take your cardboard and cut it a little bit wider than the width of your window. I will not use measurements because, every window has different sizes. You can also cut your wallpaper pattern. It should look like this when cut:

Next, take your tacky glue and spread glue over the entire piece of cardboard. You can then glue the wallpaper to the cardboard. You can use a credit card to smooth the wallpaper down to be sure there are no bubbles. It should look like this:


Next, you will take your lace trim and glue it to the bottom edge of your wallpaper


It should look like this when that step is completed


Next, you can take your wood and cut it a little bit shorter than your Cornice piece like this:


Bend each end of your Cornice and glue the wood block in place to help keep the shape of the Cornice when glued in place. Turn your Cornice over because once the glue is dry, it is ready to be attached. It should look like this when completed:

You can even add an extra step by adding some lace curtains. I just used some lace found at Hobby Lobby or Micheal's. You would do this by gluing the lace to the backside of the Cornice before you attach it to the wall.


This is what the room looked like at the end of today:

Upstairs


Downstairs


I did my workout this morning. I totally believe that having a healthy body & mind helps me be the Best person I can be for myself & my family and I can share my best and most creative work with my clients.

Today my workout consisted of Shoulders & Arms & Ab RipperX (P90X) . I hurt all over but, it feels great because it's a "good" hurt. Thought Of The Day ~ "Be not angry that you cannot make others as you wish them to be, since you cannot make yourself as you wish to be" ~ Thomas à Kempis

Many times, we look at others successes or accomplishments and think we can never reach our individual goals because we view the other person as someone not human. Each of us are just plain human beings. Set you Goals and work towards achieving them! Keep them in front of you! So many of my friends are working out to get healthy this year. It's so fun to share Minis & healthy living with them. Feel free to join us too. You are not alone!

Thanks for stopping by to read my blog today!

Tuesday, January 18, 2011

Pink & Shabby Custom Dollhouse Day #1

Today,I realized that I have not blogged since November. One of my goals is to keep up with blogging at least weekly. Today, I'll not only blog to let you know "I'm sill here" but, I'll give you a little tutorial that I hope you will enjoy, use and share your "Eye Candy" with me when you use it for your own project.

As a child I had the typical pink bedroom that most girls my age had. When I grew up, I decided to keep my walls a neutral color in my bedroom because I LOVE to change the curtains & comforters to create a "New Look".

Being a Creative person, I get bored with the same surroundings. Lately, I have been craving that girlie room in shades of white and pink but, I know I don't want those colors in my real house. Once again I was able to create this special desire in a Miniature form .

The house I picked this time is from the 2009 Greenleaf "Contest house kit". I wanted to do something fast so that I could move on to my newest idea (A Castle Tower which I want to start on before this month's end). So this morning, I woke up at 3 am with the idea that I would do the "Girlie Get-A-Way" house first. I choose wallpapers from Itsy Bitsy Minis. I Love her patterns and I am so happy one of my Clients introduced me to there fabulous wallpaper designs.


I started building the basic kit and decided I wanted white wood floors and decided to share this "How to" with you.

First I painted the floor a peony pink. I did this because sometimes, you can see in between the cracks and the natural wood color would not look professional or clean peaking through the cracks. You can paint the floor what ever color you will use as your accent color in your room. Sometimes, I even use black on the base floor when I am creating a dark wood floor for a room.


Then, I took a bag of the Greenleaf Thin Siding Strips and cut them different lengths and glued them down to the floor. I cut them in a staggered way because that is how "Real Life" hardwood floor. You don't want the cut lines to align.


This is how it should look when completed.


Lightly sand the wood floor with sand paper. Wipe off the excess wood dust. Take out your Paint brush, white paint and about 1 ounce of water. Saturate your paint brush with your white paint and then, dip it in water. Brush the watered down paint evenly on the wood flooring.


You want the wood grain to peep through! This is what it should look like when dry:


Next, take a small stencil pattern and stencil a border around the perimeter of the floor.


It should look like this when this step is complete:


Next, you'll want to seal your floor with varnish. I used a "flat" finish. You can use a glossy or a flat varnish finish depending on the look you desire. This is what the room looked like when I finished today. Tomorrow, I'll start the outside of my "Girlie Cottage"!


Remember these are just the basics! You can change it or alter it to fit your own special plans for your dollhouses!

:)

Thank you For stopping by to read my Blog!

Thought Of The Day ~ "If you don't like how things are, change it! You're not a tree." ~Jim Rohn

Saturday, November 20, 2010

Beacon Hill Dollhouse by Tracy Topps

I created a You-Tube Video of the Beacon Hill to use in the auction that ran for this house. You can see more shots of this house by clicking the "play" button:

Hope you enjoy seeing the pictures and if interested, please bid!
:)