Translate

Showing posts with label bay windows. Show all posts

Monday, June 13, 2011

Magnolia Dollhouse Kit Build Blog Days 1 - 4


 The Original date of this blog entry was 04 April 2007

Please click pictures to enlarge them for more details! Pictures updated 8/7/2020 🙂

I am moving my dollhouse build blogs to this blog so that people can find them more easily. I hope they help assist you in building and creating your own dollhouse dreams! I have been building dollhouse kits for almost 17 years. If you would like to have one professionally built by me, feel free to contact me. You can visit my website at MinisOnTheEdge.com


April 4 2007
Posted by Minis On The Edge
The Magnolia Dollhouse Kit Day 1

This house is large enough for the child or collector. The rooms are big enough to get a lot of play out of it and yet, this house is detailed enough for the adult collector to enjoy displaying their collection of dollhouse miniatures in it. I called my Magnolia "the Maggie" for the little girl I built it for in December. I built this house, painted, electrified, wallpapered and added a base to it all in 11 days!!

This is a fun house that you can enjoy to build. Have fun watching my journey in building this delightful house!! I started building this house on the 5th of December. First I selected the floors. It took 2 sheets of this hardwood floor to complet the living room of this house. That is how large this house is!

Tracy


I then added the Kitchen floor. I only needed one sheet of this one. You can look in the pictures to see what I used


Then, I added the back wall and roof support & front wall


This house can be a fast build! I added the wallpaper to the front wall (the kitchen area & kitchen side wall) I also added the wallpaper to the living room wall


I messed up initially on my lattice trim. These parts should have been BEHIND the foundation frame. I made the mistake and assembled it in front of the foundation.

As you can see, even I make mistakes. Hopefully it will help you feel batter if you make any mistakes. I must admit that I make mistakes on all of my houses. The good thing about that is that they are all simple to correct 😉🙂 


I assembled the house using Quick Grip & Masking Tape 😃


April 9 2007
Posted by Minis On The Edge
The Magnolia Dollhouse Kit Days 2-4

This is the Kitchen wallpaper I picked for the Maggie

This is the front bay after it's been added


This is the inside of the front bay. I always add the wallpapers as I assemble the house


I used "Old English" to stain the wood floors because the wood was too light for my customer


I added the top front wall after I added the wallpaper
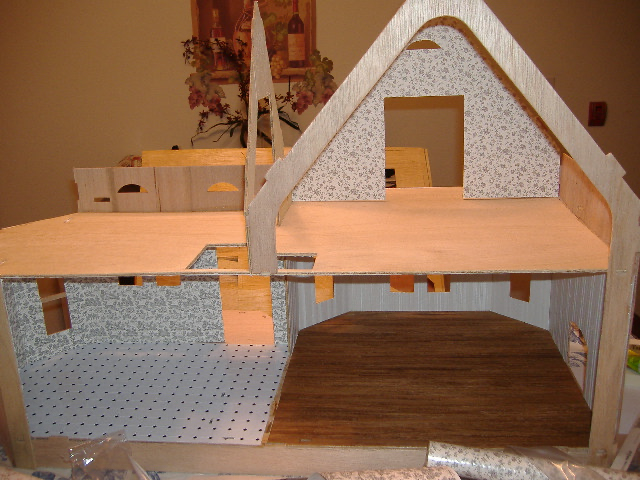


The top Divider wall has been added now too


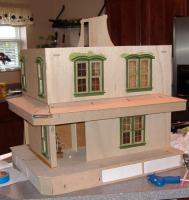
My customer that I built this house for, wanted the house to be the same colors as it was on the box so I had to try and find paint colors to match those colors. I did not want a "flat" paint look so I added a little textured (I got my customers approval of course first). I used the Greenleaf "Stucco" and added paint to it for the outside walls


This is the inside of that same wall


This is the outside walls once I finished them


Thank you for viewing my Blog! ✿(◠ ‿ ◠)
Thought of the day ~  "If your ship doesn't come in, swim out to it." Johnathan Winters
Hope you are all having a Fantastic Day!! ~


Monday, June 6, 2011

Lily Dollhouse Build Blog Days 4 & 5

06 June 2006
Posted by Minis On The Edge
It's Electric

 I decided to show a little bit how I electrify the houses. I find it hard to explain in words but pictures talk in words that I may not express well so here you go.

I am just adding the extra outlets that my customer wants in this house right now so that is what the pictures will show. I started out with an electrical outlet with a plug at the end pictured below. The end plug will fit into the electrical strip later on.


Now, drill a hole in the floor where you would like to add the outlet so you can feed the wire through the ceiling and down below the base of the house


Now, take the plug and remove the prongs at the end of the plug. Place them in a cup or soda pop top where you can find them easily! They are so small that if they fall on the floor, they find a way to blend into the carpet or wood floors you may have
:lol:


Now, gently remove the plug base (the white part) from the wire


Now, take that wire and feed it through the hole that you drilled in the floor of the house


Take the paper off of the back of the outlet and stick it into place on the wall


After you feed the wire through the hole all the way to the base or bottom of the house, you will then start adding the parts back starting with feeding the wire through the plug (white part)


After folding ONE wire in EACH hole (Two wires so one wire should fit in each of the two holes), you will then add the brass prongs in the hole in contact of the wire


You can now plug this into a power strip and use your outlet. You can hide the wire behind moldings so they will not be noticed easily.
:o

Hope this helps. I will try and take pictures and show the next step when I get to that part while I assemble the house.


13 August 2006
Posted by Minis On The Edge
Stair Placement & Partitions

Now it's time to glue the staircases in. If you want your foyer to look neat and decorated nicely, NOW is the time to do it (Before you add the kitchen wall and glue in the stairs). It will be VERY hard to reach these areas later on. Originally, I thought a partition went in a different place which means I messed up my flooring! :o

  Please note WHERE these partitions go so you won't make the same mistakes. Notice that the wires for the lights are taped out of the way while I build. I am using paperclay on the inside walls but you can hide these wires later by using wood trim that has a groove cut in it to hold these wires so that you'll never see them.


Right Wall & Bay Sides & Back Foundation Wall

This house is coming along WONDERFULLY!!! It has so many details that are missed from the 2 pictures shown on the box of this kit!! I am totally in LOVE with it's design. The bays went together easily and so did the back wall of this house. Here are pictures of where it goes and how


Porch Assembly 

Now this part was a little tricky for me because I do not plan to use the lattice trim on my porch. My foundation will have clay with stones sculpted in them.

Be sure to follow the instructions and lay the house on it's back while you assemble the foundation part. It is VERY important to position porch foundation piece # 1 into foundation slot in the order as noted on the drawings or else it will NOT fit right (I bet you can figure out how I know that one :lol: )


I also had issues finding the porch ends for the top and spent time talking to Lynette (Nutti) on the phone as we both tried to figure the porch roof parts. We got off the phone and I was still a little lost but I pushed forward and was able to finally figure it out. I am such a visual learner and not having pictures with these instructions for this kit really threw me off completely for a bit. I was afraid to use my glue LOL.


The Thought Of The Day ~ Mistakes are painful when they happen, but years later, a collection of mistakes is what is called experience.


 Thank You For Taking The Time To  Read My Blog Today!! Hope You Have a Great Day!

Tracy

 ♥☆♥♥☆♥♥☆♥♥☆♥♥☆♥♥☆♥♥☆♥

Tuesday, May 31, 2011

Coventry Cottage Dollhouse Build Blog Day 1 & 2

The following blog is of the Coventry Cottage created by Greenleaf Dollhouses. It is a really cool kit and is very versatile. If you can visualize something in you minds eye, you can create it. This house inspired me to add or change things that are not on the box cover. I built this kit and did this blog back in the Spring of 2006. Follow along with me as I build this kit!

17 March 2006
Posted by Minis On The Edge
Looking for Ideas Day 1 Part 1

 Well, I have had this in the box for about 3 weeks and I keep changing my mind on how I want this one to be done. My first thought was to try to tole paint it similar to the one Sally Eckel did for Greenleaf. There used to be a decorating packet by her that shows you how to create your own original like hers pictured below.


Then I decided that I wanted to create a tower where the porch is at. But, as with all of my projects,  they seem to sometimes have a mind of their own. I hope you enjoy following me on this new journey of creating & Bashing (dollhouse editing)  a Coventry cottage. I hope to inspire everyone and encourage you so that you can see that you can make YOUR Dollhouse Dream House different from the one that appears on your kit box. 


Last night was the first day I had to finally get started on my Coventry Cottage. I was still thinking to myself, "Will I have a tower, if so how can I make the adaptions quickly since I have only a limited amount of time to work on this one." I have been reading the instructions trying to come up with ideas and decided last night it was time to start the build.

I Love this kit and this will be my third time building it but my first time bashing it. This kit is fun and it sort of lock together. Greenleaf made a couple houses that has this same interlocking system such as the Cantebury and the Story Book Cottages. The tabs on some parts are longer and helps to create the "raised" foundation.
Here is the first step showing the front wall.


See the long tabs? It is so important to slide this as far as you can because it can mess up the entire alignment of the house (roof and all :blink: )


It is very good to glue it when you are directed to glue it in the instructions so that you will not have any shifting . This is the center wall that locks into place.


This house has one Small tricky part and it is locking the second floor in place. These instructions are updated because the picture in the instructions is MUCH more clear on what to do and how to do it. Here are a couple of pictures of how this is done. 


This one shows the right wall:


17 March 2006

Posted by Minis On The Edge
Day 2 Bay Windows

I started on the Bay Windows. I have also decided to add an extra room to and omit the porch. I created a wall in the front that will have the front door.


This house has one BIG tricky part and it is with the bay windows. It is almost impossible to assemble it with out breaking a part. You can glue it back together and it will be almost as good as new. Don't panic if this happens :blink: . Every time I have built this kit and the Storybook Cottage, I break one of the window sills or another part of the bay window structure. A little glue and a lot of sanding afterwards and you'll have a smooth finish that does not show the break. ;) 


In the picture below, I was thinking about adding a false wall on the side that opened up so that you could see the hallway.  


Well, after looking harder and also building it, my mind started thinking something else. I closed the wall up and open up the kitchen wall


I will be adding paper clay to this house too.

Thank you for stopping by to read my blog!