The Original date of this blog entry was 04 April 2007
Please click pictures to enlarge them for more details! Pictures updated 8/7/2020 🙂
I am moving my dollhouse build blogs to this blog so that people can find them more easily. I hope they help assist you in building and creating your own dollhouse dreams! I have been building dollhouse kits for almost 17 years. If you would like to have one professionally built by me, feel free to contact me. You can visit my website at MinisOnTheEdge.com
April 4 2007
Posted by Minis On The Edge
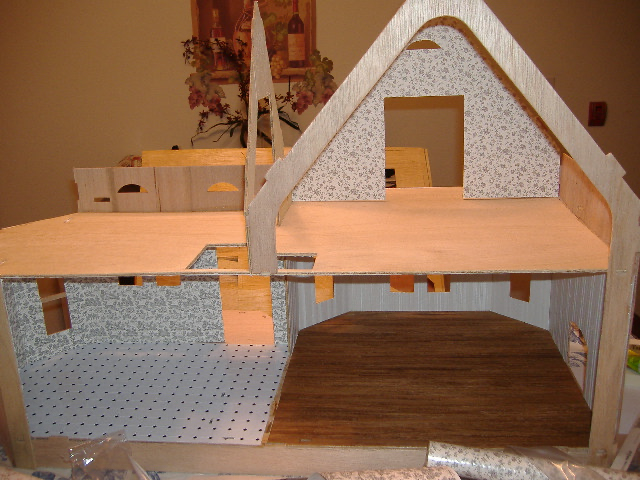
The Magnolia Dollhouse Kit Day 1

This is a fun house that you can enjoy to build. Have fun watching my journey in building this delightful house!! I started building this house on the 5th of December. First I selected the floors. It took 2 sheets of this hardwood floor to complet the living room of this house. That is how large this house is!
Tracy

I then added the Kitchen floor. I only needed one sheet of this one. You can look in the pictures to see what I used

Then, I added the back wall and roof support & front wall


This house can be a fast build! I added the wallpaper to the front wall (the kitchen area & kitchen side wall) I also added the wallpaper to the living room wall

I messed up initially on my lattice trim. These parts should have been BEHIND the foundation frame. I made the mistake and assembled it in front of the foundation.
As you can see, even I make mistakes. Hopefully it will help you feel batter if you make any mistakes. I must admit that I make mistakes on all of my houses. The good thing about that is that they are all simple to correct 😉🙂


April 9 2007
Posted by Minis On The Edge
The Magnolia Dollhouse Kit Days 2-4
This is the Kitchen wallpaper I picked for the Maggie

This is the front bay after it's been added

This is the inside of the front bay. I always add the wallpapers as I assemble the house

I used "Old English" to stain the wood floors because the wood was too light for my customer

I added the top front wall after I added the wallpaper
The top Divider wall has been added now too

My customer that I built this house for, wanted the house to be the same
colors as it was on the box so I had to try and find paint colors to
match those colors. I did not want a "flat" paint look so I added a
little textured (I got my customers approval of course first). I used
the Greenleaf "Stucco" and added paint to it for the outside walls


This is the outside walls once I finished them

Thank you for viewing my Blog! ✿(◠ ‿ ◠)
Thought of the day ~ "If your ship doesn't come in, swim out to it." Johnathan Winters
Hope you are all having a Fantastic Day!! ~


2 comments:
I know you did this eons ago but I have a question! I am having difficulty with the brick pattern. What did you use to get it to stick to the wood?
Hi there! Thank you for viewing my blog! I used wood glue on the wood that I was adding the brick sheet to and also smoothed it all over the backside of the brick sheet. I waited about 5 minutes after I added the glue to the brick sheet AND wood before I added it so that it would get tacky and stick. I think I did use my clamps to hold some parts together till it dried. Hope this helps :)
Post a Comment