I had been looking for some of the tutorials I've done online in the past and decided to start putting them on my blog. There are so many that I forgot I had even done some of them. This one is featuring the Faux dollhouse bed tutorial I did for the Greenleaf Gazette back in 2011. You can view that Newsletter by CLICKING HERE
You'll need:
Card board
lace trim
2 sheets of wallpaper or scrapbook paper with different patterns
white glue
hot glue and hot glue gun
5" x5" square of fabric
scissors
A smile on your face :)
lace trim
2 sheets of wallpaper or scrapbook paper with different patterns
white glue
hot glue and hot glue gun
5" x5" square of fabric
scissors
A smile on your face :)
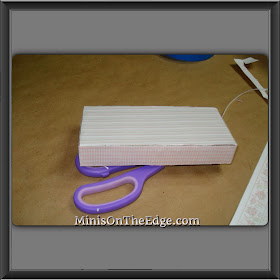
First you will cut your card Board Pieces
in the sizes listed below. (One size is not pictured in the photo below
but will be needed and shown later on.)
2 pieces 3" x 1"
1 piece 6 1/2" x 3"
2 pieces 6 1/2" x 1"
1 piece 5 1/2" x 1"
1 piece 6 1/2" x 3"
2 pieces 6 1/2" x 1"
1 piece 5 1/2" x 1"
Now assemble your bed so that it looks like the one picture here. I used my hot glue gun for this:
Pick your wall paper and cut it to a
size a little bigger than the top of your bed. Add white glue over
every inch of this so that the wallpaper will not buckle. I did mine
this way then I used a credit card to smooth the glue completely over
the top.
I laid the wallpaper over the glue and
smoothed it over (you can use a clean credit card for this part too).
Take a sharp hobby knife and cut the wallpaper to edge of the
cardboard.
Take your second wallpaper pattern and
this will go around the bottom half of the bed. It should look like the
picture below when this step is completed.
Now take your lace that you will use as a
bed skirt and your white glue (I used Aileen's fabric glue). Add
white glue where the two wallpaper patterns meet and add the lace along
this. Remember to cut enough of this lace so that you can create a
little bit of a pleated or flowing look. You do this by "pinching" some
of the fabric lace together at some points. Let it dry completely.
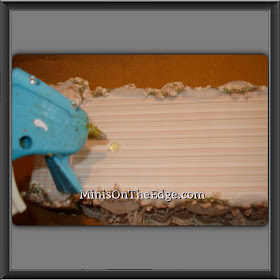
Now, get ready to add your second lace
trim. I used my glue gun so that I could speed this along. Remember,
use it very sparingly. If you are not good at being very neat with the
glue gun, your can use white glue (I did that on the first bed I
made). If you use white glue, be sure to use enough but not too much
or it will come through the lace and look messy. As you add the lace,
remember to press it so that it adheres to the glue. It should cover
the rough edges so that you can not see them any longer.
Now take your cardboard piece sized 5
1/2" x 1". This will be the pillow part of the bed. Add the glue from
the hot glue gun along the bottom of one side of this piece. Then add
your wallpaper to it. You will wrap the wallpaper around to the other
side and then glue it in place nice and tight.
Glue the "pillow" across the bed. I
added more lace because I wanted mine to look very "Girlie". Now of
course, if you like your bed like this, you can stop here and enjoy.
You can pose a doll on top or have pillows, dolls or even a book to
make it look used or lived in. I choose instead to add a draped cover
over mine. Continue to the next step to do this step.
Take your fabric and your lace trim. Add
white glue around the edges and begin pressing it down so it will not
come apart. Be careful because you don't want to use too much glue as
it will stain the fabric! When I get to the corner, I do not cut the
lace. I pinch and fold it (add a touch of glue) and continue the run
like show in the 2nd picture
This is one of mine completed:
Now to drape it over the bed, you need
your fingers wet (not dripping) and you need to fold your fabric in a
way that it will be in the direction you want to lay it. When it dries,
it will lay more easily! When it dries, get your hot glue gun and add a
drop of hot glue, where you want your cover to start at. I used hot
glue because white glue will bleed through (and it will take longer to
dry). I then press and pinch the fabric so that it will fold nicely and
look natural.
Pinch and press at the top; then add another glue drop at the bottom and pinch & press.
Then glue it around the edges and it ends up looking like this when completed:
This one Below was the first one I did for a Dollhouse
If you like the Cornice I made, you can see the tutorial for it by Clicking HERE
Next, I'll Blog the Faux Dresser which works very well when you have very small dollhouse rooms you are working with.
Thank you for viewing my Blog and for the encouraging comments you leave for me. I really do Appreciate them. Please send me pictures of yours if you create one and feel free to share this with your miniature clubs or other craft groups.
Tracy Topps


it's so cute! thank you for the bed tutorial :)
ReplyDeleteHugs
Marisa
thank you for the bed tutorial, Im going to use it for my dollhouse.
ReplyDelete